Table Of Content
Making a basic plate is easy, but can become progressively more difficult when you use more advanced techniques to add texture or details. You will create your own unique plates to enjoy for life. I am a lover of pastel colors – so I had to feature one of Esther Griffith’s beautiful ceramic pieces. Make sure to visit her website to see all of her works on different forms of media. Here are some gorgeous ceramic pieces created by Kentaro Kawabata.
Gold painted feather design
So, after the texture is added, some work has to be done to restore the pot to its thrown symmetry. You can create interesting glaze effects using wax resist. For example, you can apply one layer of glaze, and then paint a wax resist design on the first layer of glaze.
Pottery Decorating Technique # 5 – Slip Trailing
Fill a couple of slip trailing bulbs with at least two different colors of slip. I find the best way to combine different colored clay is to color quantities of the same clay body with different ceramic stains. Or you can apply a clear glaze to the entire piece to give the whole pot a shine.

Different Ways of Decorating Pottery
A wide stem will ensure that the cake stand does not wobble. Alternatively, you can make a conical-shaped stand, and use the widest part of the cone as the foot of the stand. This sounds simple enough, but there are a few tips to making the process easier. The sections of the slab are then joined together, and the box is assembled like a carpentry project. There is a couple of ways that you can make a classic-looking rectangular butter dish.

Holiday Gift Ideas: Lindsey Epstein Pottery - Eventing Nation
Holiday Gift Ideas: Lindsey Epstein Pottery.
Posted: Sat, 23 Nov 2013 08:00:00 GMT [source]
You can hold your jewelry or some pocket change in smaller ones, or create a fruit bowl out of a larger leaf. You can find some of her pieces on Koromiko or on her website as well. If your pottery is already glazed, you need a specially formulated paint that will adhere to a very smooth surface (or glass). You’ll find options for these paints in the Panting Supplies section above. You need paint that is appropriate for the pottery you’re using.
FREE Painting Tutorials on YouTube
Once they have firmed up a little you can move them onto another surface to allow them to dry fully. This technique involves scoring into the edge with a tool like a serrated rib, or even a regular kitchen fork. When the two edges are pressed together the scored and slipped surfaces create a good firm bond. The best way for beginners to start this project is by using a forming mold.
Plates with faces
This video will help guide you through the process of crafting your very own Berry Bowl with Saucer. By following the tutorial, you can easily create a beautiful, functional pottery piece. Making a honey jar with a matching honey dipper and lid is a fantastic project for pottery wheel beginners. You’ll not only have fun shaping and designing the jar but also be able to make add-ons if you like. A helpful resource is my instructional video, which guides you through the process of making a candle holder. Bowls are a fun and popular project for first-year students to embark on.
Intermediate Ceramics Ideas
So, go ahead and dive into this project and enjoy the satisfaction of creating a beautiful and functional piece of pottery. Making a salt pot with a lid is a creative and enjoyable project, especially for new potters. This wheel throwing project involves creating a closed dome-shaped container to hold salt, which can be challenging but also very fun. There are different ways to create salt pots, and this is one I like to create. It’s a simple and fun way to get better at using the pottery wheel while also making something decorative and useful. So go ahead and give this beginner-friendly pottery wheel project a try.
5 Pretty Pastel Picks from Pottery Barn's New Easter Line - Better Homes & Gardens
5 Pretty Pastel Picks from Pottery Barn's New Easter Line.
Posted: Wed, 29 Mar 2023 07:00:00 GMT [source]
Having a visual guide will help you understand the process better and improve your skills. If you’re unsure about any of the steps or techniques, my instructional video will help guide you through the process. Watching the video can help you understand the process better and make your project more successful. Or you could use the slab as a base and add modeled details on the surface of the slab.
And then add the spout onto the pitcher body using a separate smaller slab. There are two main types of mold, the hump mold, and the slump mold. A hump mold is a convex shape that curves outwards, like the hump on a camel’s back. A slump mold is a concave shape that curves inwards, like the inside surface of a spoon. Then, assemble the sections of your paper template together and make adjustments so that the pieces fit together.
For tips on how to roll an even slab of clay have a look at my step-by-step guide here. Using your thumbs and finger slowly hollow out a ball of clay. As the clay thins out, start to add the details of the frog’s eyes and legs. Just use the same pinching method to create a small bowl-like shape with your clay. Then roll another piece of clay into a small cylinder and flatten out one end to create a sturdy base.
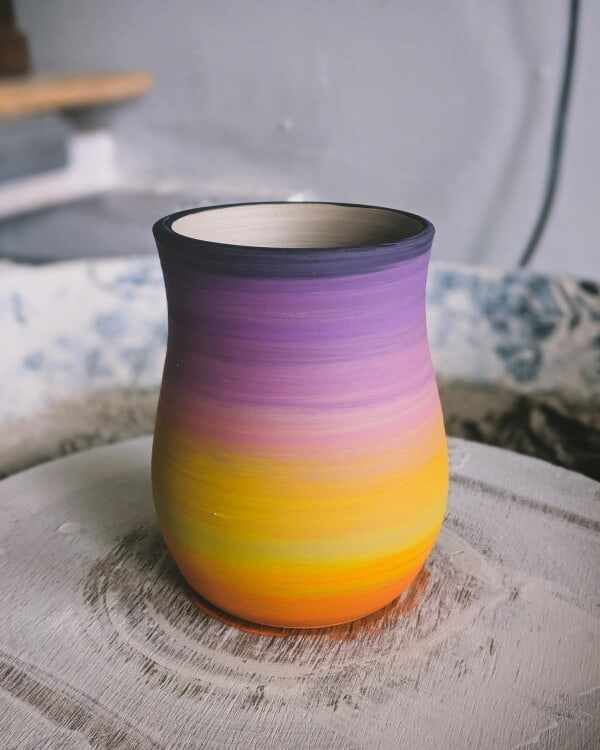
I am a ceramic lover – especially those that are imperfect and handmade. Basic paint, a brush and a steady hand is all you need to paint these beautiful vases in muted tones. This beginner-friendly pottery design is a great way to personalize your mug, or craft a gift.


No comments:
Post a Comment